Building an XR Application in Unity with MRTK [Part 8] — Oculus Quest Support
To setup Unity to support Oculus development, follow the instructions from Oculus here (Set Up Development Environment). Of note, the Android module needs to be installed with the current version of Unity on your development machine.
To configure MRTK to work with the Oculus platform, follow the guide from MRTK here. The primary steps are 1) to install the Oculus XR Plugins with Unity via the following
Edit → Project Settings → XR Plug-in Management → Plug-in Providers
and 2) to install the Oculus Integration Unity package for hand tracking support (if desired).
MRTK Config Update
Outside of downloading/install all of the SDKs and libraries to support Oculus in the Unity development environment, there is one important step in the MRTK Quest setup that should be highlighted here.
After install all libraries, the MRTK GameObject in the scene which holds the configuration data for runtime, needs to be updated to use the Oculus XRSDK Data Provider. This data provider will be created at runtime by MRTK and this class will be responsible for providing MRTK with input and other related data from the Quest device to the rest of the MRTK systems (ex: Input system)
- Select the MRTK GameObject in the root scene
- Select the Input tab on the left
- Select Input Data Providers and Add Data Provider
- Then for type, select OculusXRSDKDeviceManager and related profile

- Alternatively, make a new clone of the DefaultXRSDKInputSystemProfile for the InputSystem profile

- Finally, ensure setup by activating in the Unity toolbar Mixed Reality Toolkit > Oculus > Integrate Oculus Integration Unity Modules

Utilizing Hands
Oculus Quest now supports hand tracking if enabled both in app and on device in lieu of using touch controllers. See Hand Tracking in Unity by Oculus for more details. Other than enabling the feature in device via settings, the application also needs to be enabled to support hand tracking in the Android manifest. This can be easily fixed with MRTK by searching for the MRTK-Quest_OVRCameraRig prefab, or other OVRManager prefab component utilized by the app, and under the Quest section > Hand Tracking Support list > select Controllers and Hands.

NOTE: This UI will only appear if the Android platform is selected in the Unity build window settings.
Run the App on Oculus
The easiest way to try out this app on device is to plug-in your Quest 2 (or other Oculus device) via USB to your computer, then click play mode and don your device! Being able to by-pass the UWP build as previously done for Hololens development (Part 7 section) allows for much faster development iteration time.
NOTE: After connecting the Quest 2 to the development PC via USB, don the HMD and agree in the UI to enable USB Debugging, Oculus Link, and any other prompts.
For building an APK though, please follow steps below and additional instructions for building MRTK with Oculus are found on their online documentation.
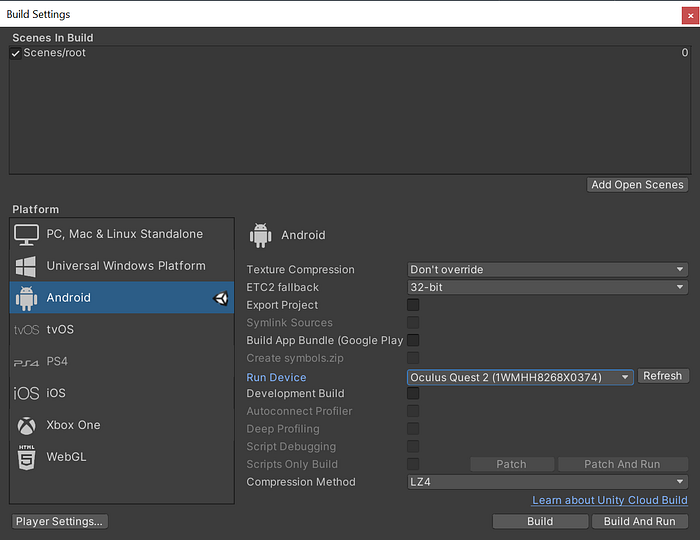
- Open up the Build settings (Cntrl+B)
- Select Android as the target platform
- Select the Oculus Quest under Run Device
- Click the Build & Run button
Previous section: [Part 7] — Building the App
